Public Details
Your public business name may be used on invoices and receipts. Please make sure it's correct and familiar to your customers.
Visit Settings > Public details
Update your "Public business name". Also, use an email address with your publication's domain under "Support email". That's where your supporter's email replies will go.
Branding
Check Branding Settings > Branding
Your brand will be reflected on invoices, Stripe emails and Customer Portal.
Configure your customer portal
Customer Portal is where your supporters login to manage their subscriptions and payment information. To give them more control, set as the following:
Visit Settings > Billing > Customer portal
- Under "Cancellations", select “Cancel Immediately”.
- Under “Subscriptions”
- Enable “Allow customers to change products”.
- Enable “Allow customer to change quantity”.
- Select products to be available for customer upgrade.
- Under "Business information", update your Portal Header to something like "Support Local Independent News", and on "Redirect link" add your homepage.
- Click “Finish”.
Add your custom email domain
Stripe will use your custom email domain as sender if you add it. This will help prevent Stripe emails from ending up in your supporter's spam folder. Visit Settings > Customer Email > Your custom email domains.
Add your domain and copy paste all DNS records Stripe provided at your DNS host. When finished, click on "Verify". Stripe will take a few days to authorize it; you'll get notified via email. Once approved, visit Settings > Customer Email > Your custom email domains, click on the three dots and select "Send email from this domain".
Add your Payment Method Custom domain
Some payment methods like Google Pay and Link require you to add your domain. To do that, visit Settings > Payment Methods Domain > Add a new domain. If you already configured your custom email domain, all you need to do is add your domain.
A small step by step will appear – but this is only for Apple Pay. We suggest you configure it later, after confirming this payment method is available for your site. Click "Skip it for now".
Over Settings > Payment Methods, make sure Link and Google Pay are enabled and Apple Pay remains disabled.
Prevent failed payments and send invoices
Under Settings > Subscriptions and emails you can allow Stripe to remind your supporter about expiring credit cards. For that, scroll down a bit until you see Prevent failed payments > Customer emails. Toggle on "Send emails about expiring cards". Then select "Use your own custom link" and add your Support page. The best option would be "Link to a Stripe-hosted page" but it's only available for Billing Scale plans.
To send invoices, scroll down to "Manage invoices sent to customers". Under Customer emails, toggle on "Send finalized invoices and credit notes to customers".
Turn on automated receipts for payments
We recommend automating this function. Otherwise, you’ll end up having to manually send them when supporters ask. Additionally, receipts help supporters keep track of their donations. Without them, you might have to field more emails from them asking about the status of their support and/or for refunds.
Under Settings > Customer emails, there is a section called “Payments.” Toggle on the buttons for “Successful payments”. If you would like, you can also toggle on “Refunds” to make sure supporters are automatically notified when they request a refund.
How to create Payment Links
If you spot a payment marked as "Incomplete", likely the supporter didn't wait for Indie Tech Pay to fully process the payment and left the page. In that case, you can create a Payment Link with the desired amount and share the link with the supporter. The payment will go through a Stripe hosted checkout page.
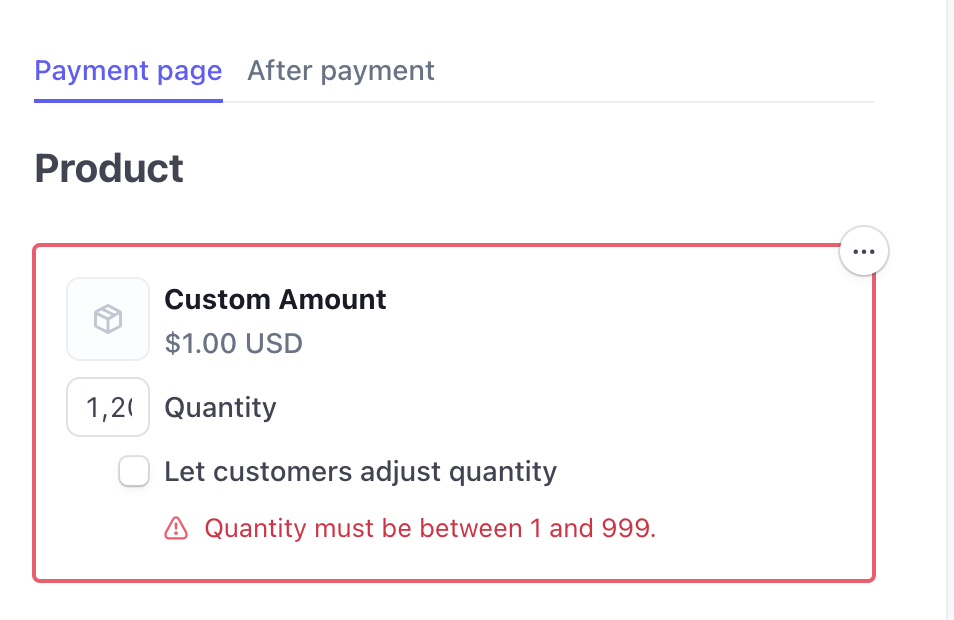
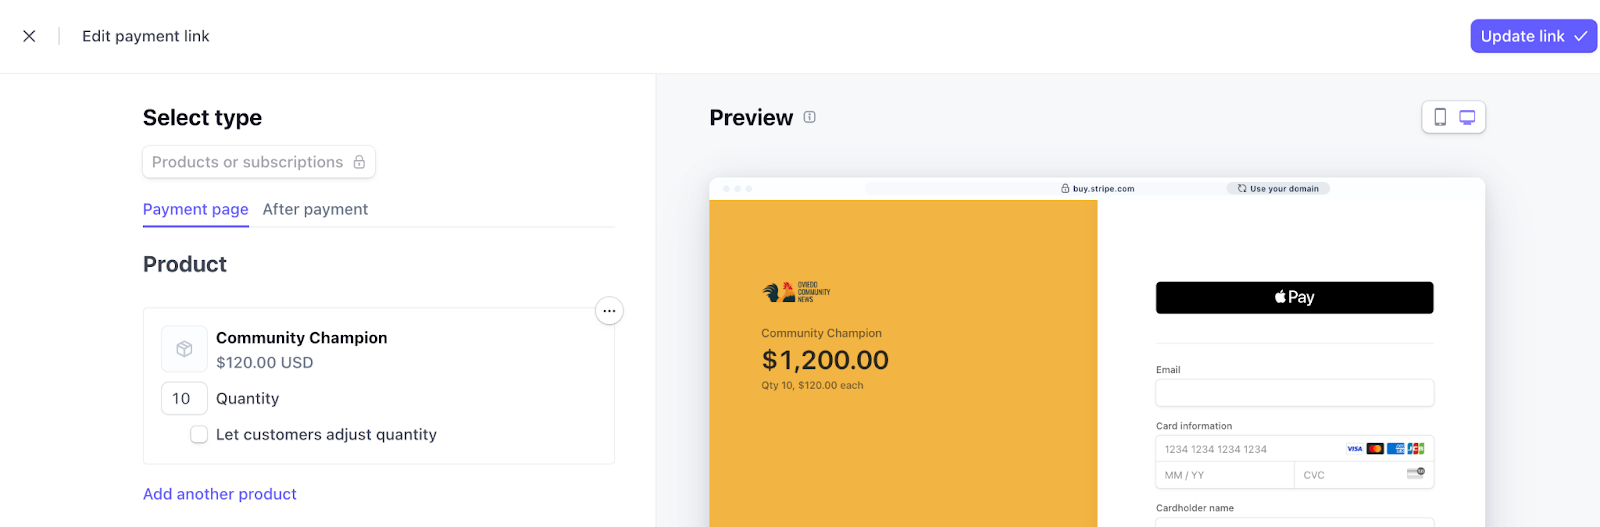
- On the left menu, click in More > Payment Links > New
- Select a product from the drop down.
- If you choose a Custom Amount, adjust the quantity to match the supporter donation amount. Keep in mind that amounts should be between 1 and 999.
- You can set quantity for all Products/Pricing, so select the one that fits your needs. Make sure that "Let customers adjust quantity" is disabled.
- Click "Create Link".
- Copy the payment link and share it with the potential supporter.
- Payment methods available will be the same ones available via Indie Tech Pay.